






This guide covers what to do after paying for Email Hosting until an address like name@yourdomain.com receives mail.
What you need
- An Email Hosting service that is active. The administrator (postmaster) login is emailed to you after payment.
- Access to where your domain's DNS is managed: at Mudah Cloud, at another registrar, or at a service such as Cloudflare.
Step 1: open the Email tab
- Sign in to the client area.
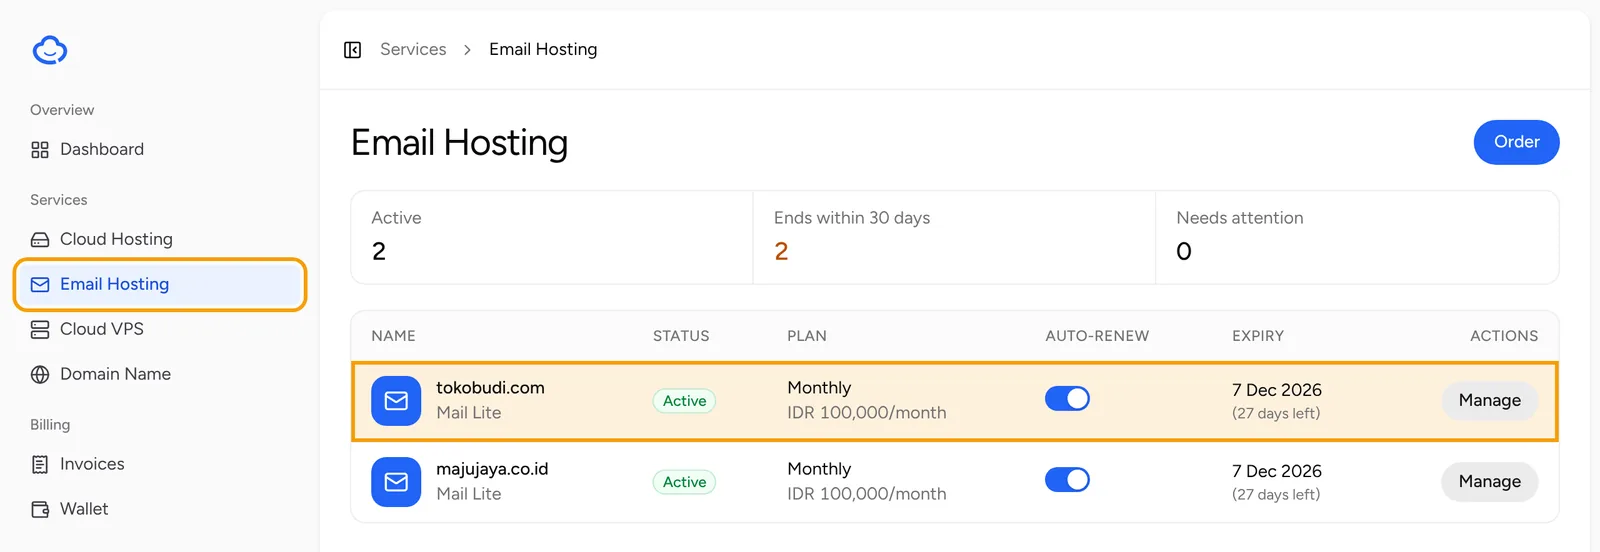
- In the sidebar, open Services and then Email Hosting.
- Click your email service and open the Email tab.
Step 2: add the DNS records
The DNS records section lists every record to add, with its type, host and value.
- Open your domain's DNS manager in another tab.
- Add each record exactly as shown. Click a value in the table to copy it.
- The Verification record (TXT) comes first. Mailboxes cannot be created without it.
- If the domain already has an SPF record (starting with
v=spf1), do not create a second one. Add theincludepart shown to the existing record. - The DMARC record is marked recommended. It is optional, but it helps keep your mail out of the recipients' spam folders.
- Go back to the Email tab and click Check DNS. Records that are read correctly show Found.
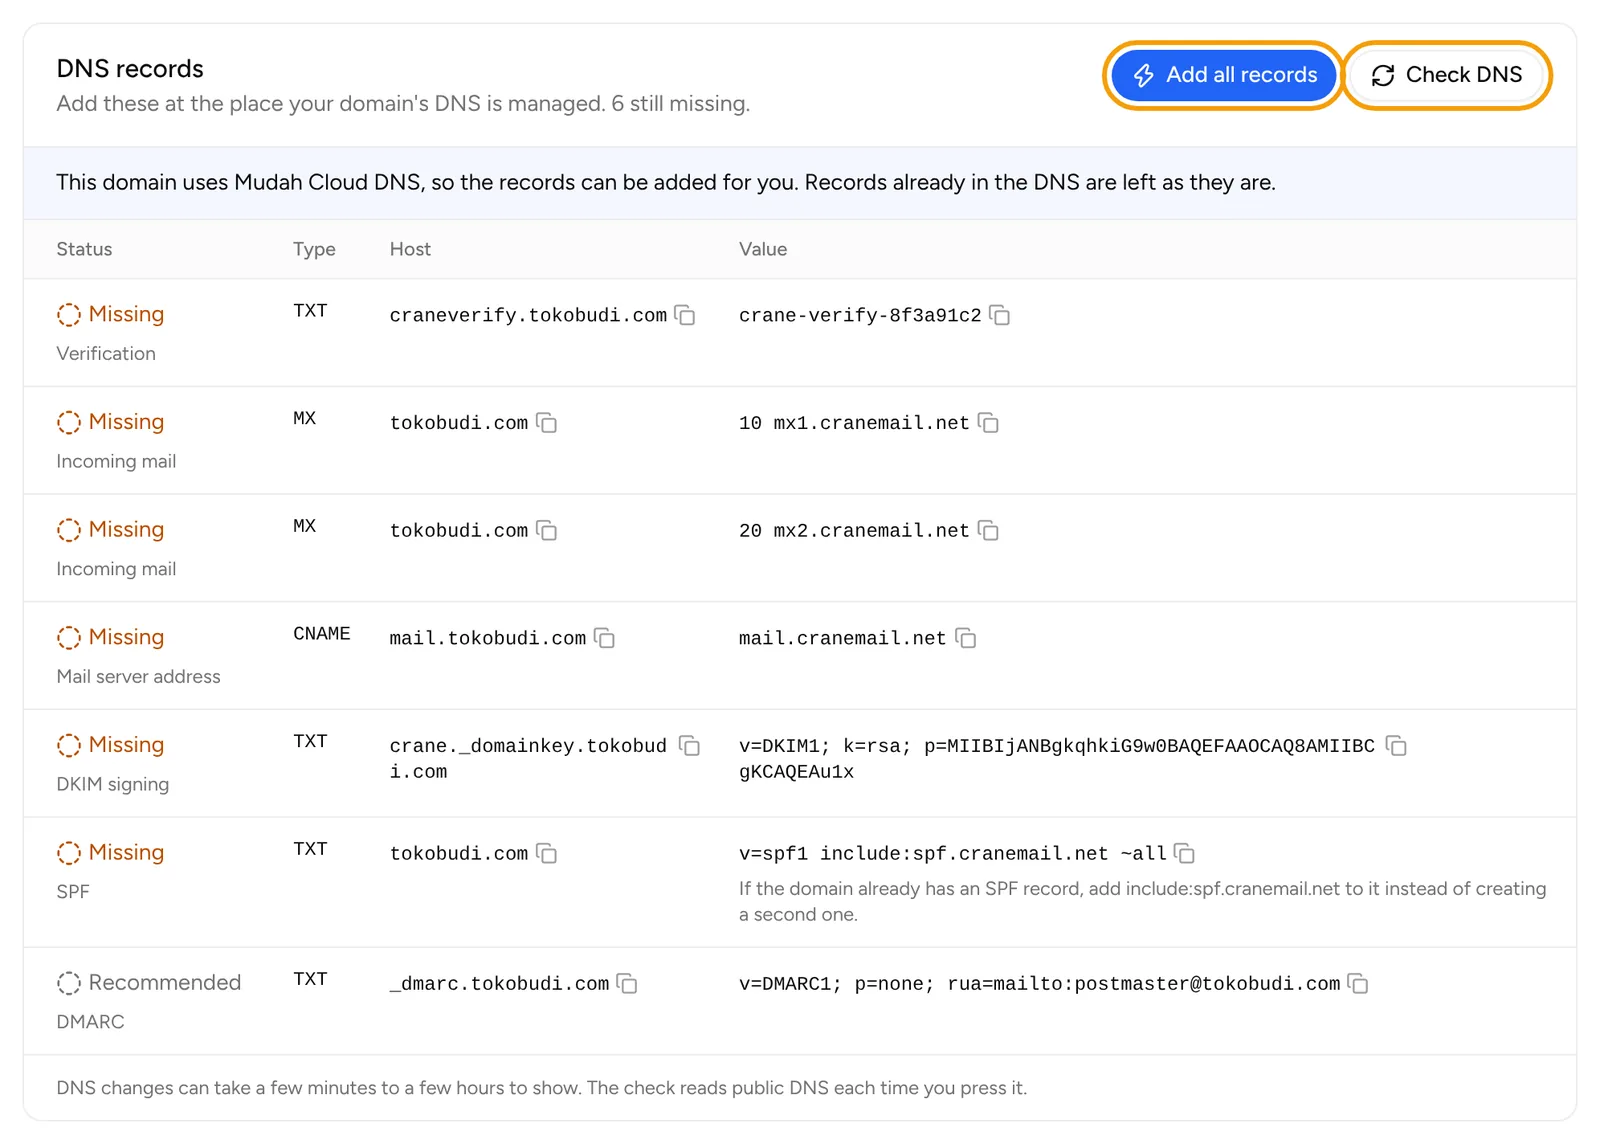
If the domain is registered at Mudah Cloud and uses our nameservers, there is an Add all records button. Click it to add every record at once instead of copying them one by one.
DNS changes can take a few minutes to a few hours to show. If a record still shows Missing, wait a little and check again.
Once the domain is verified and active, we email you that mail for the domain now arrives.
Step 3: create mailboxes
- In the Mailboxes section, click Add mailbox.
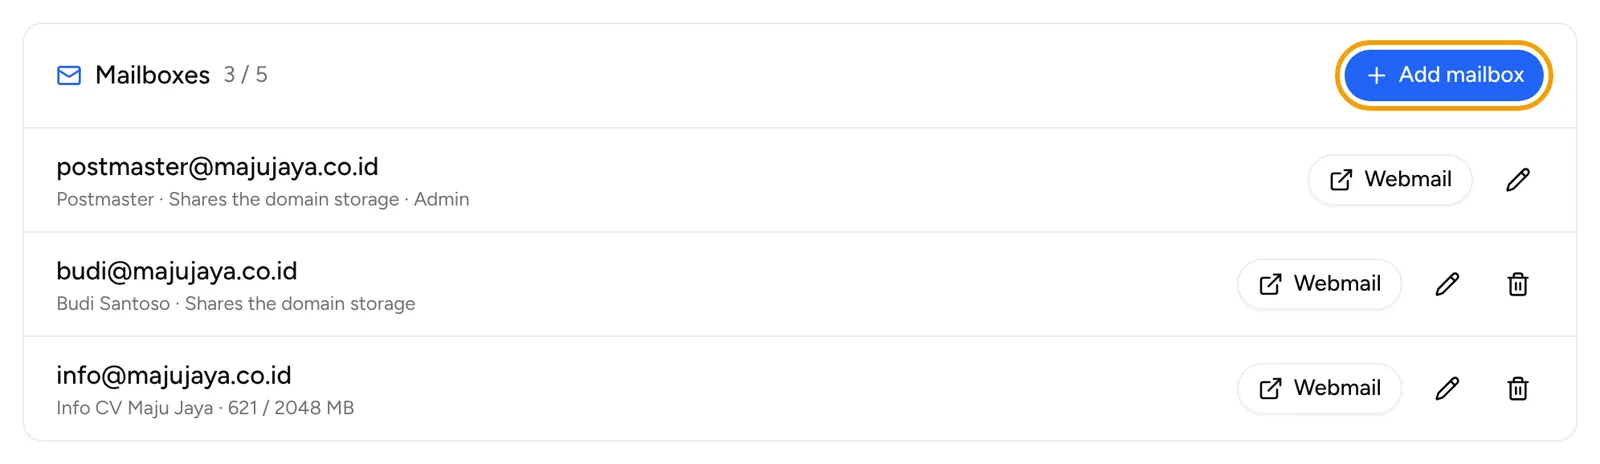
- Enter the address, the part before the @, such as
infoorbudi. - Enter the full name, then a password of at least 8 characters, or click Generate a password.
- Leave the quota at 0 to let the mailbox share the domain storage.
- Click Save.
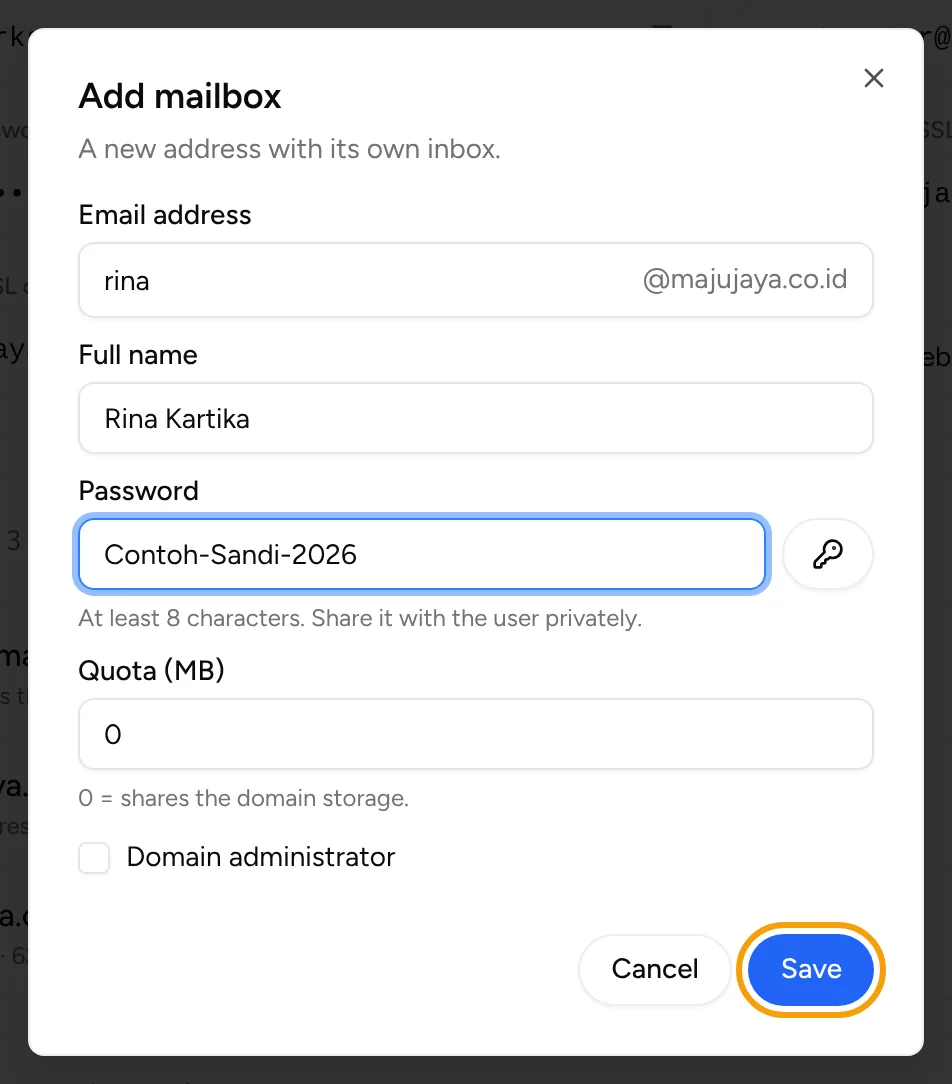
You can open a mailbox right away with the Webmail button next to it, without typing the password.
More on the Email tab
- Aliases & forwarders: an address that forwards to one or more mailboxes, such as
sales@to two people. Tick Catch-all to also receive mail sent to addresses that do not exist.

- Domain aliases: a second domain that receives mail for the same mailboxes. Add its verification TXT record as shown first, then point the second domain's MX records to the same server.
- Spam filter (SpamExperts): open the spam filter panel to see the quarantine and release held mail.
If something goes wrong
- Mailboxes cannot be created yet: the verification record is not read yet. Check that the host and value match exactly, then click Check DNS.
- No mail arrives: check the MX records. Remove old MX records that still point to your previous email provider.
- Mail is sent but lands in spam: make sure SPF, DKIM and DMARC all show Found.
For other help, open Help and then Tickets, click New ticket, choose Technical support and pick your email service.